START WRAPPING
Learn How to Use BEE Zero Waste's Beeswax Wraps
With the increase in plastic pollution, it makes sense to switch to an alternative eco-friendly product. Learning how to use beeswax wraps to replace the plastic you would use to keep your food fresh is the best decision you can make for both you and the environment. Instead of wrapping your child’s lunch in cling wrap or using a plastic sandwich bag, why not try out our sandwich beeswax wrap? Depending on how often you use it and how well you care for your wraps, they can last you up to a year, this will also save you from spending hundreds of pounds on plastic sandwich bags and cling wrap. At BEE Zero Waste, you can find numerous wraps in different patterns that you can switch to.

Benefits of Eco Food Wraps
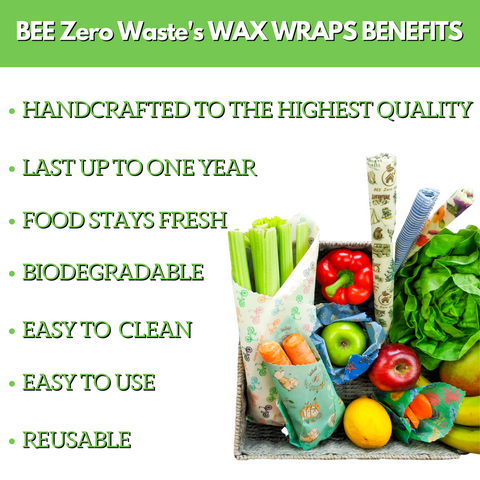
While you may be used to wrapping up your leftover food in cling wrap, making the switch to beeswax wraps allows you to enjoy many health and environmental benefits. Here are just a few benefits you can take advantage of when you decide to use these products:
-
Sustainability. While the wraps last longer, you won’t have to purchase them as often as you would plastic packets and cling film. You will save money while you are contributing to the environment. Reducing your carbon footprint is a significant benefit for our planet.
-
Health benefits. There are different health benefits you can enjoy with eco food wraps, these include your food being kept fresher for longer, so no more worrying if your food is safe to eat. There are no chemicals used in the making of the wraps so your food won’t be contaminated.
-
Multiple uses. There are many ways to use this product. You can use them to send your child’s lunch to school, wrap your food in it and freeze it, and you can even use them to cover your jars of preservatives.
How start your wrap
- Unfold your wrap. To loosen, flex and fold the wrap between your fingers. It may feel a little rigid at first but it quickly loses its stiffness.


How to wash
CLEANING BEESWAX WRAPS:
1. Fill your sink with cold water and mild dish detergent.
2. Place your wraps in the sink then use a sponge or cloth to wipe them down.
3. Rinse wraps under a cold running water
4. Once washed, beeswax wraps need to dry fully before being stored. To do this we recommend draping wraps over washed dishes or the kitchen tap to allow the air to circulate. Note: You don’t need to wring out the wrap
5. Once dry, store wraps by rolling or folding and placing in a drawer or cupboard away from heat sources. We tend to store ours with our tea towels to ensure they’re good to go at a moment’s notice.

Few basic rules to ensure you get the most from the wraps.
-
Do not cover anything hot
-
Do not wash in hot water as this will cause the wax to melt
-
Do not use in a microwave or oven
-
Since our wraps are washed in cool water, we recommend not covering raw meat or fish for food hygiene reasons.
-
We also suggest putting acidic items like lemons in a bowl first before covering. This is because citric acid can sometimes start to break down the wax over time.
-
Avoid naked flames too. Beeswax is extremely flammable. This is why they make excellent firelighters when they reach the end of their life.

LONGER TERM MAINTENANCE & refreshing
One of the easiest ways is to refresh your wraps when they are tired is by melting the wax slightly. This can be done very easily with something like a hair dryer or they can be placed in the oven.
If refreshing no longer works it might be consider a full re-wax. Check our listing for refreshing drops or rejuvenation block. (Available vegan version)

How to refresh wax wraps
With the correct care and attention, beeswax food wraps should last up to 12 months.

ELECTRIC OVEN REFRESH METHOD
Place your wrap on a tray lined with baking paper then preheat the electric oven to 60ºC. Place the baking tray in the oven and allow the wax to melt and redistribute. You’ll know when it’s time to remove your wraps as the melted surface wax will look wet. Once removed from the oven, separate your wrap from the baking paper immediately before the wax has time to cool.
Note: Do not leave your wrap unattended in the oven. You should also not use a gas appliance for this task as beeswax is flammable when presented to a naked flame.
IRON REFRESH METHOD
Place your wrap in between two sheets of baking paper. Iron for a few seconds on a high temperature with no steam. Once the wax has been melted, remove from the baking sheets immediately and then waft your wraps to encourage drying.

How to re-wax beeswax wraps
REWAXING on the other hand involves adding additional wax to your wraps and will extend their use-life significantly. This will also make them feel like new.
Depending on frequency of use, the rewax process is normally recommended after around 4 - 6 months of use.
You’ll know when your wraps need “rewaxing” as the process of “restoring” is no longer as effective. You’ll also find that your wraps start to lose their stiffness, feeling more like standard fabric.
You will need:
-
Iron and ironing board (steam function disabled)
-
1 x clean tea towel (old)
-
2 x sheets of smooth baking paper (5cm bigger than the wraps on each side)
-
1 x BEE Zero Waste's beeswax / vegan wax rejuvenating block or refreshing drops
-
1 x fine cheese grater
Put a tea towel on your ironing board and cover with one sheet of pre-cut baking paper. Remember, the paper should be at least 5cm bigger than the wrap on each side to catch any excess wax.
Using a fine cheese grater, grate the refresher block over the wrap lightly. Paying particular attention to the areas where the wax has worn the most. Alternatively, you could cut the block into small pieces using a knife.
Once grated, put the second piece of baking paper over the top of the beeswax wrap. Ensure there is at least a 5cm overlap of baking paper on each of the fours sides of the wrap.
Set the iron to the highest temperature. Once pre-heated, iron over the top baking paper sheet using a constant motion. Do not hold the iron in the same spot as you may burn the wax.
Work the iron over the whole wrap. You’ll notice a ‘wet look’ under the baking paper that spreads as the wax melts and distributes. Make sure you get right into the corners and edges.
Be quick with this next step as you don’t want the wrap to stick to the baking paper. Peel the top layer of baking paper away. Hold the wrap at the corners using thumb and forefinger then peel it away from the bottom sheet of baking paper.
Gently waft the wrap for around 15 - 25 seconds until the wrap stiffens.
Complete again for each of the wraps you wish to rewax.

WRAPIGAMI
Fold a pouch
1.Fold and roll
2.Fold the wrap in half and roll the edges in 3 times.
3.Twist and tuck
4.Twist the edges in and tuck them to open up the space for the pouch.
5.Fill and Seal
6.Fill your pouch up with your fresh food and seal by rolling the top and squeezing tight.
